Getting Started Guide for Certification Brands
Certification brand coordinators usually do not take a direct part in the event management, entrusting it to trainers. Instead, they focus on issuing licenses and collecting fees for licenses and licensed events. Workshop Butler helps coordinators with these tasks and automates most of the processes.
You have just got access to your Certification Brand account in Workshop Butler and want to get everything set up and running. This guide is here to help you get acquainted with the key functions in the shortest time possible.
Add an event type
All events in WSB are divided into categories. Each category might have several types belonging to it.
As a brand coordinator, you can add event types and give access to them to your trainers, in accordance with their qualification. It will allow trainers to create licensed events of these types.
For example, Scrum.org has trainers around the globe who offer courses (or events) such as Professional Scrum Foundations, Professional Scrum Master, Professional Scrum Master II, and so on. Those events are each an Event Type on Workshop Butler.
For a trainer, all types you made available for them will be grouped under one category with your brand’s name.
Let’s add several event types:
- Open the dropdown menu in the top right corner, click on Account Settings, and choose Event Types in the Settings section on the left side:
- Click on +Add Event Type:

- Fill in the Name of the Event Type, the Default Title, and the Min/Max number of chargeable hours per event. See the brief explanation of each below the screenshot.

Name is the name of an event type. A brand must have at least one. A coordinator from Scrum.org, for example, can list Professional Scrum Foundations as an Event Type.
Default Title parameter helps you to add events faster. When you choose an event type on a form, the system automatically sets the title of a new event to the default value. For example, the Event Type used as an example above can have more than one event associated with it, e.g. 2-day course and 4-day live webinar. The 2-day course might be the default event associated with this Event Type.
Max hours parameter defines a maximum number of chargeable hours per event. For example, max hours = 16 and a trainer creates an event for 25 hours of this type. The trainer will be charged for only 16 hours. Additional 9 hours are free.
Min hours parameter is relevant if trainers are able to create events of a total number of hours less than the chargeable amount that you set.
If you do not charge per hour, you can simply type in 0 here.


You can find more information about event types here.
Add a licensed event fee
Workshop Butler calculates royalty fees and tells you how much to charge your trainers per unit. This module alone could save you hours of work and hundreds of Euros that you might forget to collect.
The detailed process of configuring event fees is described in this article.
Use it to set fees for your brand.
Add a license type
If event types are the way to group events, license types are the way to group trainers.
Trainers have different qualifications, experience, and achievements. For more experienced trainers, you might want to issue a more expensive license that has more benefits and allows to run the larger variety of events. Or you might want to group trainers in accordance with their skills - one license type for the trainers with one set of skills and another license type for the trainers with a different set of skills.
This way, it will be easier for you to configure their accounts, event fees, and assign event types.
If you do not plan to group your trainers, you can just add one license type.
The detailed process of adding license types is described in this article.
Add a trainer
Now that you’ve added event types and license types and set up event fees, you need to add trainers who will run events:
- Click on the icon on the right side of the top menu:
-
 Enter the name or email address of the trainer (we recommend an email address) to check if the trainer already has an account in Workshop Butler. It's possible that they have already been added by another organisation:
 -

- If not, or you wish to add a new trainer, click the Create New Person button, then add their personal data:
- Add a billing address:
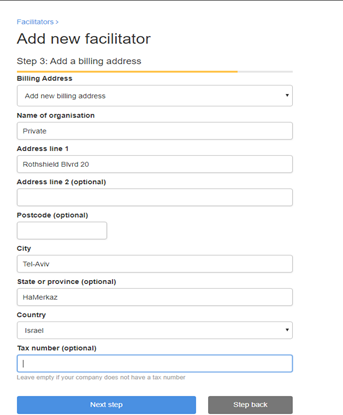
Billing address is the address where you will send invoices for licensed events. A trainer will be asked to choose a billing address when creating such an event. For more information, read this article.
After adding the billing address, you will see that the field of the Brand that you represent has already been filled in.
- Assign a license. Select the License Type > Select the License Version (if there is more than one license version per brand) > Select the term for which the license is valid – from start to expiry > Select the currency and fill in the payable amount per term > Select Next step to finish creating the account:

If you plan to assign several licenses of different types to a trainer, you can do it after you finish creating their profile. Read this article for more details.
 Enter the name or email address of the trainer (we recommend an email address) to check if the trainer already has an account in Workshop Butler. It's possible that they have already been added by another organisation:


Important note: once you have finished creating the trainer’s account, they will be able to edit it by themselves. However, you can manage it as well: open the list of Facilitators from the top menu > choose a trainer > click Manage.
Configure other settings
Apart from the essential options described above, WSB has a lot of additional settings that can make your life and the life of your trainers easier.
-
Obligatory evaluations
When the event is finished, WSB starts requesting evaluations and issuing certificates to attendees if the relevant options are enabled. Usually, it sends a certificate after a trainer approves the evaluation. However, a trainer can issue a certificate manually, without waiting for an evaluation.
If you want to be sure that only those who have provided their feedback receive certificates, you can activate the Obligatory Evaluations option. It will prohibit generating certificates for those without an evaluation.
To activate this option, open the Account Settings - Settings and find the Obligatory Evaluations block.
You can find more information in this article.
-
Exclude free events
Because people tend to rate free events higher than paid ones that they evaluate more critically, it would be unfair for a trainer who offers a series of free 2-hour workshops to get higher rates than a trainer who offers that same amount of 2-day courses at a payable rate. By default, ratings of free events are included in the trainer statistics.
You can change that by activating the Exclude Free Events option in the Account Settings - Settings.
See the details in this article.
-
Learning modules
Each event usually consists of several themes (or modules). Trainers can make shorter events covering a few modules and longer ones including more topics.
You can charge these events differently, creating different price groups for them. WSB will calculate the fee for you automatically, depending on the number of modules used in an event.
For this, you should go to the Account Settings - Settings and activate the Support for Learning Modules option. The detailed process is described here.
-
Materials' language
You can make the process of organising events easier for trainers by activating the Material Language option.
It’s useful if you have materials available in different languages. When configuring a registration form, trainers can let attendees know what language they should expect in materials or slides.
To activate this option, go to the Account Settings - Settings and find the Material’s Language option. You should activate it first, then add languages.
The process of adding a language is described here. And here you can find how to delete a language.
-
PDU support
By default, trainers cannot add the duration in hours when creating events. You can allow them to do it with the Support for PDU option.
When it's activated, trainers can specify the number of hours per day and the total number of hours for each event. It will be shown in the event description and on certificates and will be especially useful for the attendees who need to study a certain number of hours to get certification.
This option can be activated from Account Settings - Settings - Support for PDU. -
Team
It can be difficult to manage all events alone. Adding coordinators who will help you could be a good idea. They will have the same rights as you except that they cannot delete you because you are the account owner.
You can manage your team from the Account Settings -> Team tab in the General section on the left.
More detailed information about managing a team can be found in the Team Management articles in the Help Center.
There are other options available to certification brands, such as managing invoices, licenses, and trainers. We will describe them in the second part of our guide.